We are still checking the figures on activity pages in game. If you find a mistake, let us know on Discord.Figures still being checked. Mistake? Discord
Open World PvP
A zone’s colour on the world map is its rule for fighting other players. In blue zones only enemy
Factions fight, in yellow and red zones a player has to flag hostile first, and in the black zones
of the Outlands everyone outside your party, guild and alliance is an enemy. The more dangerous the
zone, the more Fame, loot and Silver its creatures pay, and the more a lost fight costs: in a yellow
zone a knockdown and some durability, in red and black zones everything you carry.
Journal goals
4 of the 32 goals the journal sets here, from the easiest to the hardest by the game’s own rating.
Everything below the explanation comes from the game files, except the official patch notes at the end.
Zones with PvP
348
348 of 395 on the world map
Black zones
276
Q1–Q6 · Tier 5–8
Reputation ranks
10
-50,000 … 50,000
Treasure chests
13
Small · Medium · Large · Coffer
Four colours of zone
The colour on the world map says what happens when players fight. Pick one to see its rules from the files.
Blue
In Blue Zones you can't be attacked by any players.
Yellow
In Yellow Zones you can be knocked down by PvP-flagged players.
The game says
- You can set yourself to "hostile" using the button by your Avatar - Hostile players can attack and knock down other players - Everyone can see the number of hostile players in the area - Non-hostile players gain a bonus against hostile players - When players are knocked down, some of their equipment's durability is converted into Silver and dropped - Knocked-down players can either get back up or die and respawn, abandoning their equipment as loot
Red
In Red Zones you can be killed by PvP-flagged players.
The game says
- You can set yourself to "hostile" using the button by your Avatar - Hostile players can attack and kill other players - When players are killed, ALL equipped and carried items are dropped or destroyed and can be looted by anyone - Killed players must respawn - Groups of more than 10 players will show up on the minimap
Black
In Black Zones anyone can kill or be killed.
The game says
- All players are hostile - All players can attack and kill all other non-allied players - When players are killed, ALL equipped and carried items are dropped or destroyed and can be looted by anyone - Killed players must respawn
Blue
Yellow
Red
Black
Who can attack
Only enemy Factions
Players flagged hostile
Players flagged hostile
Everyone
Losing a fight
Knockdown, 180 s
Knockdown, 90 s
Death
Death
What you lose
5% durability, part of it dropped as Silver
5% durability, part of it dropped as Silver
Everything: dropped or destroyed
Everything: dropped or destroyed
Item power
soft cap 1,200, 20% above it
soft cap 1,200, 20% above it
no cap
no cap
Reputation to enter
≥ -1,000
≥ -20,000
≥ -20,000
any
Logout
10 s (30 s Faction-flagged)
10 s (30 s Faction-flagged)
60 s
60 s
Abilities on entering
ready
15 s cooldown
15 s cooldown
15 s cooldown
Hostile players count
none
exact number on the minimap
exact number on the minimap
a rough range on the minimap
Disarray
no
no
no
yes
Faction flag
yes
yes
yes
no
Might
no
no
no
yes
Mementos
no
no
no
Combat Memento, Battle Memento, War Memento
Hideouts
no
no
no
yes
Journey Back price
×0.363 of the base
×0.55 of the base
×3.3 of the base
×7.15 of the base
Creature Fame / loot / Silver
+115% / +25% / +45%
+140% / +33% / +53%
+230% / +125% / +160%
+320%…+530% / +160%…+260% / +200%…+350%
Zones
47, Tier 3–5
42, Tier 5–6
30, Tier 6–7
276, Tier 5–8
The Fame, loot and Silver bonus is what the zone colour multiplies a creature’s reward by; the game’s loot window shows it as “+160%” for ×2.6 and adds a hidden ×0.9 to loot and Silver.
The game’s world map, every zone coloured by its PvP rules. Hover a dot for its name, click to open the zone.
Blue: 47Yellow: 42Red: 30Black: 276Grey dots are cities and places without PvP rules of their own.
Who can attack whom
Your status in the rows, the other player’s in the columns. Party, guild and alliance never fight each other (30 seconds after leaving one, still not).
You ↓Them →
Friendly
Hostile
Enemy Faction
Friendly
Hostile
Faction
The hostile player loses reputation by the victim’s rank and turns Outlaw for 3 min.
The hostile flag and the Outlaw
The button by your portrait switches between Friendly and Hostile. In black zones it does not matter: everyone is hostile.
Hostile
Turning hostile
15 s channel, damage breaks it
Back to friendly
not for 15 min after flagging hostile
Turning friendly
15 s channel, damage breaks it
Click to change to hostile. Changing to hostile will allow you to attack all players in PvP-enabled regions. They will also be able to attack you!
Outlaw
3 min after attacking a non-hostile player (in black zones: anyone)
An Outlaw cannot:
enter a city or a blue zone
enter a Hideout or a Smuggler’s Den
use Journey Back
use an invisibility shrine
sign up for an Expedition
City guard towers shoot Outlaws.
Reputation Info
Attacking, knocking down or killing a non-hostile player costs a hostile player reputation, more the better the victim’s rank. Creatures and gathering earn it back.
Rank
Neutral
You can enter
BlueYellowRedBlack
Expeditions
yes
Against hostile players
no bonus
Daily recovery
none
The ranks
Rank
From
Attack / knockdown / kill costs the attacker
Reputation per 1,000 Fame
Zones
Glorious
10,000 or more
10 / 50 / 1,000
1.4
Noble
5,000 … 9,999
7.5 / 37.5 / 750
2.8
Virtuous
1,500 … 4,999
5 / 25 / 500
4.2
Reputable
500 … 1,499
2.5 / 12.5 / 250
5.6
Neutral
0 … 499
1 / 5 / 100
7
Suspicious
-1,000 … -1
—
8.4
Infamous
-3,000 … -1,001
—
14
Villainous
-10,000 … -3,001
—
28
Nefarious
-20,000 … -10,001
—
42
Dreaded
-50,000 … -20,001
—
63
What a fight costs
You lost … points of reputation for killing ….
Getting it back
PvE Fame
—
or gathering Fame
—
or days of recovery
—
Our reading Our reading: every point of Fame turns into reputation at the factor of the rank you are in, band by band. The files give the factor and no formula; the 2021 patch notes change it as a factor of Fame.
Losing a fight
Pick how the fight ends and how many attackers there were, then roll. Each item is rolled the way the files state it.
Example set: a Tier 6 plate set with a horse, food, potions and a stack of bars.
The corpse’s loot stays 30 minutes.
Black zones: for 90 s only the victim’s allies, the killer, the top damage dealer and their allies can loot.
Yellow and red zones: the files give 120 s of protection, which we read as the same rule. our reading
A yellow-zone PvP knockdown lasts 90 s; after 30 s you can respawn at the region entrance.
Executing a knocked-down player: 1.5 s cast from 2 m.
A dead player who picks nothing respawns on their own after 10 minutes; a knockdown has its own timer. our reading
Many against few
The counter under the minimap tells you how many are around. Then three rules keep numbers from deciding every fight: Resilience on a focused target, Healing Sickness on a target healed by many, and Disarray on a side that brings too many.
How many are around
Blue—no counter
Yellow23the exact number of players flagged hostile
Red23the exact number of players flagged hostile
Black16–30only a range, counting everyone: you and your allies too
Black zone: who is behind the range
The counter shows
Others in the region
15 to 29
A group of 11 or more players in one 40 × 40 m square shows on the minimap as a red circle (yellow, red and black zones). our reading
The steps are from the game files and the patch notes confirm the 16–30 and 31–50 ranges; not checked in game.
The game says
Number of hostile players. This can include yourself, as well as your party, guild, and alliance members.
Resilience
from melee
—
from ranged
—
while you are mounted
—
Our reading Resilience Penetration comes only from the awakened trait of the same name, which only melee weapons roll: up to 14%. Penetration as a share off the Resilience is our reading.
Healing Sickness
—
You have been healed by too many sources. Healing Received decreased by ….
Disarray
Battle mounts on your side (free up to 15 points, the rest adds levels)
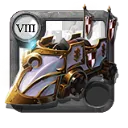
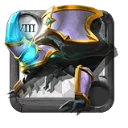
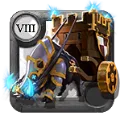
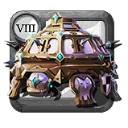
Crystal Roving BastionDisarray Cost: 5
Crystal Colossus BeetleDisarray Cost: 5
Crystal Tower ChariotDisarray Cost: 5
Elder's Command MammothDisarray Cost: 5
Flame BasiliskDisarray Cost: 5
Crystal BehemothDisarray Cost: 4
Crystal Battle EagleDisarray Cost: 4
Crystal JuggernautDisarray Cost: 4
Crystal Goliath HorseeaterDisarray Cost: 3
Crystal Ancient EntDisarray Cost: 2
Crystal Battle RhinoDisarray Cost: 2
Siege BallistaDisarray Cost: 2
Crystal Phalanx BeetleDisarray Cost: 2
Disarray level
—
Your damage and CC duration on them
—
Theirs on you
—
Our reading Our reading of “depends on the difference of Disarray levels”: the row of the table whose level is the difference. Only black zones and the Roads use Disarray; Journey Back is off while it is active.
The game says
Disarray reduces the damage and crowd control duration your alliance inflicts when fighting smaller forces. The greater the difference in group size, the stronger this penalty becomes.
Battle Mount Disarray limits how many Battle Mounts an alliance can deploy effectively in a region.
Each Battle Mount, when mounted, contributes its Battle Mount Disarray Cost to the alliance's Battle Mount Disarray value.
Alliances have a Battle Mount Disarray budget of 15 per region.
If this value exceeds 15, the excess is added to the alliance's total Disarray, increasing its penalties.
Homesick
If you are part of a group of 21 or more players, the effect of Disarray is increased significantly. Removed when entering your home, or a city outside the Outlands.
Changing zones
What happens in the first minute after you cross into a zone with PvP.
0 s15 s30 s45 s60 s
Bubble: invulnerable, unseen by creatures30 sends at 30 s, after 150 m, or when you attack, cast or interact
+20% move speed15 s
Abilities on cooldown15 s
No new bubble60 s
Dismounting with a hostile player within 40 m puts every ability on a 5 s cooldown (15 s if a fight is going on nearby).
After leaving a party, guild or alliance you cannot attack its members for 30 s.
After a Static Dungeon you cannot enter a Hideout for 120 s.
Combat ends 20 s after the last hit. our reading
You can change zones again after 10 s. our reading
Logout
Blue: 10 s (30 s Faction-flagged)
Yellow: 10 s (30 s Faction-flagged)
Red: 60 s
Black: 60 s
Open-world treasure
Treasure Chests appear at random where PvP is possible, stay locked for a while and open an Open PvP area around them. The journal files them under Open World PvP.
Opening: 5 s channel within 5 m, dismounted; damage breaks it.
A zone rolls its treasure slot every 3.7–11 min with a 62.4% chance (more often on a busy server), one chest at a time; up to 5 Coffers at once. our reading
In a Province in conflict the same slot rolls Faction treasure instead (see Faction Warfare).
Only black zones pay Might for opening a chest. It is split across the party, never across fewer players than: Small 1, Medium 3, Large 10, Coffer 1. our reading
What a kill pays
Kill Fame. Kill Fame is worked out from the victim’s items, shared among the attackers within 50 m. our reading
Mementos
A kill in full-loot open-world PvP (the Outlands and the Roads) can drop a Memento. The more the victim’s items are worth, the likelier and larger; each assist adds 20%.
The file states the chance in a comment: item value ÷ 221,184 (War Memento) / 110,592 (Battle Memento) / 55,296 (Combat Memento) × (1 + 0.2 × assists), rolled from the largest Memento down.
The file also sets an item power difference of 100 / 200 that the comment does not explain.
Where each Memento drops, and where it stands
Combat Memento · Battle Memento · War Memento: Obtain a Kill Trophy by killing a player in the Outlands or Roads of Avalon
Demonic Memento · Infernal Memento · Abyssal Memento: Obtain a Kill Trophy by killing a player in a Corrupted Dungeon or Hellgate
Shrouded Memento · Veiled Memento · Nebulous Memento: Obtain a Kill Trophy by killing a player in the Mists
A Memento stands outdoors, in a dungeon or on an expedition, never inside a building.
War Memento, Battle Memento, Combat Memento carry your guild’s logo; the other kinds do not.
Mementos are not listed on the Marketplace and cannot be salvaged.
Each one names the killer, the victim and the place. Keeping those details (Preserve, in the trophy’s window) costs nothing.
After 30 seconds knocked down in a blue or yellow open-world region you can respawn at the nearest region entrance; not as an Outlaw, in Faction Warfare combat or inside an open PvP area.
Battle mounts add to Disarray: each one in the region adds its cost (Ancient Ent 2 … Command Mammoth, basilisks, Colossus Beetle 5). Only what goes over 15 per alliance adds levels; Disarray now runs to level 99.
Party Leave Protection: after leaving or being removed from a party, guild or alliance, you and its members cannot attack each other for 30 seconds.
Five underground passages between yellow and red zones are replaced by direct connections, to make red zones easier to reach.
Faction-flagged players in yellow zones can now execute knocked-down Faction-flagged players; knockdowns between Faction players do 30% less durability damage.
Unmounted players get slightly less Resilience from 5 attackers up, and melee weapons lose 10% Resilience Penetration, so ranged weapons do better against big groups.
Blue and yellow zones get an item power soft cap: 1,200, with item power and awakened traits counting 20% above it.
Knockdown after losing a PvP fight in a yellow zone: 180 → 90 seconds. Knockdown durability damage shrinks with an item power cap, and so does the repair.
The Outlands player count shows 16–30 and 31–50 instead of a single 16–50 range.
In the files: a step at 31 players joins those at 0, 6, 16, 51 and 151.
Kill Trophies (Mementos): a chance for one whenever you kill a player in full-loot PvP, larger and likelier the more the victim is worth. Open World Mementos drop in the Outlands and the Roads; knockdowns and self-kills give none.
Homesick: entering the Outlands from a Portal Town with your Home elsewhere in the Outlands no longer loses your Home but makes you Homesick, which raises Disarray sharply in groups of 21 or more (level 1: 1% → 21%).
Outlaws and players in combat cannot enter a Smuggler’s Den.
Treasure Chests that had appeared in some blue zones since Horizons are gone again: treasure is meant to pull players into danger.
PvP knockdowns always last 3 minutes, attacker or victim; when an open PvP area in a blue or yellow zone disappears, friendly participants’ knockdown timers end.
Resilience (formerly Focus Fire Protection): melee curve factor 50 → 40, and lower Resilience Penetration on melee weapons.
Abilities after entering a dungeon or changing its floor: 15 → 7 seconds of cooldown. The open world keeps 15, so a gank group cannot split across both sides of an exit.
Faction-flagged logout in blue and yellow regions: 30 seconds (yellow was 10, blue 60).
The zerg circle on the minimap starts at 10 players (hotfix the same day).
In the files: the minimap counts a group from 11 (zergmingroupsize="11"), which is the "more than 10" of the zone help texts.
Small Treasure Chests unlock sooner (5 → 3 minutes); plain chests are worth 20% more and Legendary ones less; Large chests spawn half as often but are worth more.
Battle mount combat abilities are disabled in yellow zones.
For 90 seconds after a black-zone kill only the victim’s allies, the killer, the player who did the most damage and their allies can loot the corpse; then anyone can.
Journey Back: a mount ability that returns you to the last city or Hideout after a 15-second channel that damage breaks, with a 60-second cooldown and a Silver price by distance, zone type and the value you carry. It is off while you are an Outlaw, inside a zerg circle or under Disarray.
Treasure rework: treasures spawn at random anywhere in the open world where PvP is possible, in three sizes (Small, Medium, Large) locked for 5, 20 and 40 minutes, and show on the map only near their zone. The old treasure sites are removed.
Dismounting with no enemy player within 40 m leaves your weapon abilities ready at once; you cannot auto-attack players for 5 seconds after dismounting.
Leaving a dungeon, Hellgate, Corrupted Dungeon or a Roads portal gives a bubble with only a 50 m radius; the long one comes only through a zone’s main entrances.
Disarray rises much more steeply, especially in groups of 100 and more.
37 new regions on the Royal Continent, and each biome is rebalanced between blue, yellow and red zones. Enlisting with a Faction and flagging for it become two separate steps.
Disarray is no longer a flat debuff: it lowers your damage and crowd-control duration only against targets with a lower Disarray level, by more the bigger the difference.
Players moved out of a zone by the region queue stay invisible and invulnerable near the entrance for up to 150 seconds, then get the normal zone-change bubble.
Healing Sickness from two healers: 30% → 35.3% less healing received.
Durability loss on death grows with the number of attackers: 20–40% from one, 23–46% from two, up to 50–100% from 11 or more. Not when every player in the kill is Faction-flagged, in the Crystal League or in Hellgates.
Exits from the Outlands portal zones have safe areas in the next zone that give a protection bubble.
In yellow zones, hostile and Faction-flagged players are neutral to each other and cannot cast anything on each other, except inside open PvP areas such as the circles around treasure chests.
Disarray no longer lowers defence: beside damage against players it now cuts crowd-control duration and healing received, and climbs faster per player.
Disarray thresholds climb faster with army size, and rejoining the same guild or alliance has a 3-day cooldown, so nobody can drop out of the count during a battle.


 Treasure chests
 Friendly
 Hostile
 Outlaw


 Executing a knocked-down player: 1.5 s cast from 2 m.
 Resilience
 Healing Sickness
 Disarray





 Bubble: invulnerable, unseen by creatures
 No new bubble
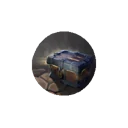
 Small Treasure Chest
 Might 596
 Medium Treasure Chest


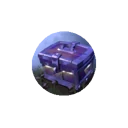
 Treasure Coffer


 Faction Warfare
 Bandit Assault
 Territories
 Castles & Castle Outposts
 Hideouts
 Smugglers
 Guild Season
 Roads of Avalon
 The Mists
 Hellgates
 Corrupted Dungeons
 The Depths